Installing adjustable spotlights is simple if you follow the right steps. You need basic tools, safe wiring, and a clear plan. When done right, these lights give focused and clean light exactly where you need it.
In many homes today, people choose small lights like spotlight 1 inch models because they look neat and save space. They fit well in ceilings and shelves. They also help control where the light goes.
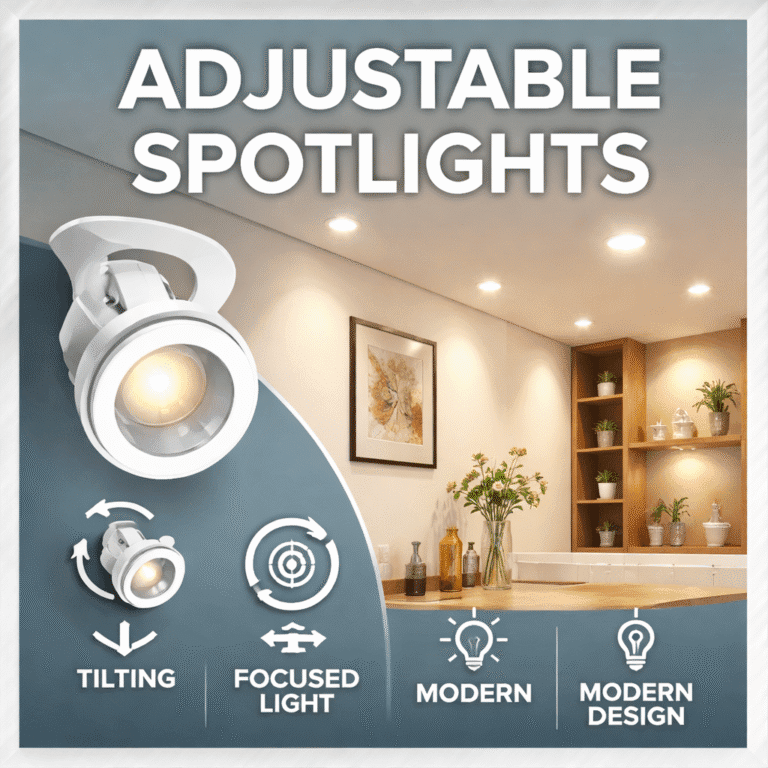
What Are Adjustable Spotlights?
Adjustable spotlights are small ceiling or wall lights that you can move or tilt.
You can point them at:
- A painting
- A table
- A kitchen counter
- A wall
- A display shelf
The head of the light turns. This helps you focus the beam.
Simple Definition
An adjustable spotlight is a light fixture that can change direction.
This means you control where the light shines.
Why People Install Adjustable Spotlights
Homes need focused light in some areas. Big ceiling lights spread light everywhere. But sometimes you only need light in one spot.
Here are common reasons:
- To highlight art or décor
- To light up dark corners
- To create mood lighting
- To improve task lighting in kitchens
- To make rooms look modern
This is why many people choose adjustable spotlights instead of fixed lights.
Why Lighting Problems Happen
Many homes have poor lighting because:
- Lights are placed in the wrong spots.
- The beam angle is too wide.
- There are shadows in work areas.
- Fixtures cannot move.
When lights cannot be adjusted, the room may feel uneven or dull.
How Adjustable Spotlights Solve the Problem
These lights solve the issue by giving control.
You can:
- Tilt the head
- Rotate the body
- Aim the beam
- Change bulbs if needed
Because they move, they work in many spaces.
For example:
- In a kitchen, you can point light at the cutting board.
- In a living room, you can highlight a painting.
- In a shop, you can focus on a product shelf.
That flexibility is the key benefit of adjustable spotlights.
Tools You Need Before Installation
Before you start, gather tools.
Basic Tools
- Screwdriver
- Drill
- Wire stripper
- Voltage tester
- Ladder
- Measuring tape
Safety Items
- Rubber gloves
- Safety glasses
Always turn off the main power before touching wires.
Step-by-Step Guide to Install Adjustable Spotlights
Follow these simple steps.
Step 1: Turn Off Power
Go to your breaker panel. Switch off the power to the room.
Use a voltage tester to confirm there is no electricity.
Never skip this step.
Step 2: Mark the Light Position
Use a pencil and measuring tape.
Make sure:
- Lights are evenly spaced
- They are not too close to beams
- There is space above the ceiling
Tip from experience: Keep spotlights about 2 to 3 feet apart for balanced light.
Step 3: Cut the Hole
If installing recessed lights:
- Use the template that comes with the light
- Drill a small pilot hole
- Cut the circle carefully
Do not cut too large.
If the hole is too big, the light will not hold tight.
Step 4: Connect the Wires
Most fixtures have three wires:
- Live (brown or black)
- Neutral (blue or white)
- Ground (green/yellow or green)
Match each wire correctly.
Use wire connectors.
Make sure connections are tight.
Loose wires can cause flicker or heat.
Step 5: Secure the Fixture
Push the light into the ceiling.
Spring clips will hold it in place.
Make sure it sits flat.
Step 6: Turn Power Back On
Switch the breaker back on.
Test the light.
Adjust the head to aim the beam.
Now your adjustable spotlights are ready to use.
Who Should Use Adjustable Spotlights?
These lights are good for:
- Homeowners
- Interior designers
- Shop owners
- Office spaces
- Restaurants
- Art galleries
They work well in both small and large rooms.
If you like modern design and clean ceilings, this type of light is a good choice.
Key Benefits
Here are the main benefits:
1. Flexible Lighting
You can change direction anytime.
2. Clean Look
They sit flush in the ceiling.
3. Better Focus
Great for task lighting.
4. Energy Efficient
Many use LED bulbs.
LED lights use less power and last longer.
5. Easy Maintenance
You can change bulbs easily in most models.
Common Mistakes People Make
Even simple installs can go wrong.
Here are mistakes to avoid:
1. Not Turning Off Power
This is dangerous.
Always switch off electricity first.
2. Wrong Spacing
Too close = too bright. Too far = dark spots.
Plan layout first.
3. Cutting Large Holes
Measure twice. Cut once.
4. Ignoring Beam Angle
Some beams are narrow. Some are wide.
Choose the right beam for your need.
5. Overloading Circuit
Do not connect too many lights to one circuit.
This can trip the breaker.
Safety Tips and Warnings
Safety is very important.
- Never install with power on
- Do not touch bare wires
- Use certified fixtures
- Check ceiling insulation space
- Keep lights away from water
If installing in bathrooms, use moisture-rated fixtures.
If unsure, stop and ask an expert.
Cost and Pricing
The price depends on:
- Size
- Material
- LED quality
- Brand
Basic models can cost around $10–$25 per unit. High-end models can cost $40–$100 per unit.
Installation cost may add:
- $50–$150 per light (if hiring an electrician)
DIY saves money, but only if done safely.
Maintenance and Best Practices
To keep lights working well:
Clean Regularly
Dust can reduce brightness.
Wipe with a soft cloth.
Check Connections
If flickering happens, check wiring.
Do Not Overheat
Use correct wattage bulbs.
Too much heat shortens life.
Adjust Carefully
Do not force the head too hard.
Gentle movement keeps it working longer.
When to Seek Professional Help
You should call a licensed electrician if:
- You see sparks
- Breaker keeps tripping
- Wires look damaged
- You are unsure about wiring
- Your home has old electrical systems
Electric work can be risky. Safety comes first.
Expert Insight on Placement
From years of lighting design work, here is one tip:
Do not place all lights in straight lines only.
Instead:
- Combine center lights
- Add corner lights
- Highlight one feature wall
This creates depth.
Layered lighting looks more natural than flat lighting.
Good lighting is not just bright light. It is balanced light.
Soft Educational Recommendation
When choosing fixtures, look for:
- Quality build
- Heat protection
- Certified wiring
- Warranty support
Some companies like Nuordic Lighting Company focus on modern interior lighting solutions with simple installation systems. It is always wise to compare product details before selecting a fixture.
Conclusion
Installing adjustable spotlights is not hard when you follow safe steps and plan layout carefully. These lights improve focus, style, and function in any room. With proper installation and care, they can last many years and provide flexible lighting exactly where you need it.
FAQs
Can I install adjustable spotlights myself?
Yes, if you understand basic wiring and follow safety steps.
How far apart should spotlights be?
Usually 2 to 3 feet apart for even lighting.
Are LED bulbs better for spotlights?
Yes, LED bulbs last longer and use less power.
Can I use them in bathrooms?
Yes, but only moisture-rated models.
Do adjustable spotlights save energy?
Yes, especially when using LED technology.